Useful links:
http://www.jesswatts.com/it/exchange-owa-redirect
http://www.ipsure.com/blog/2011/outlook-web-app-access-in-an-exchange-2010-%E2%80%93-exchange-2003-coexistence-scenario/
Friday, December 16, 2011
Wednesday, December 14, 2011
Raise Forest (Domain) Functional Level - Exchange 2003
- Log into DC machine.
- Start -> Administrative Tools -> Active Directory Domains and Trusts
- Right-click on Active Directory Domains and Trusts -> Raise Forest Functional Level...


- Start -> Administrative Tools -> Active Directory Domains and Trusts
- Right-click on Active Directory Domains and Trusts -> Raise Forest Functional Level...
- Right-click on domain name -> Raise Domain Functional Level...
Tuesday, December 13, 2011
Use Proxy Server in your browser
Here is a link with free Proxy Server IPs you can use in your browser:
http://www.samair.ru/proxy/ip-address-01.htm
Here are the settings you need to do for different browsers:
1. Internet Explorer and Chrome: [Tools ->] Options -> Connections:


http://www.samair.ru/proxy/ip-address-01.htm
Here are the settings you need to do for different browsers:
1. Internet Explorer and Chrome: [Tools ->] Options -> Connections:

2. Firefox: Tools -> Options -> Advanced -> Network -> Settings:

Tuesday, November 29, 2011
Cannot find System.ServiceModel.Web reference
This is caused by the targeted Framework.
By default Visual Studio 2010 comes with .Net 4 Framework Client Profile (for desktop applications). The System.ServiceModel.Web.dll is not available in this case.
The targeted framework should be changed to .Net 4 Full.
Here are the steps:
1. Right click on the project where you want to add the System.ServiceModel.Web reference.
2. Go to the Application tab.
3. Choose .Net Framework 4.

Website Testing Techniques
One of my coleagues mentioned this link:
http://www.codeproject.com/KB/testing/WebsiteTestingTechnique.aspx
Thanks Edi!
http://www.codeproject.com/KB/testing/WebsiteTestingTechnique.aspx
Thanks Edi!
Monday, November 28, 2011
Cannot implicitly convert type 'EvalServiceLibrary.Eval[]' to 'System.Collections.Generic.List'
For this error ,
 You need to add '.ToList<Eval>();' at the end of the line, so that both parts are of the same type.
This is how the 'case "list":' should look like:

and the 'GetEvalBySubmitter(name)' like this:


This is how the 'case "list":' should look like:
and the 'GetEvalBySubmitter(name)' like this:

Cannot load the X.509 certificate identity specified in the configuration
To overpass the "Cannot load the X.509 certificate identity specified in the configuration" error, check the above solution.


Solution (it's fast, not necessarily the best approach):
Remove the following lines from all places in App.config.
Thursday, November 24, 2011
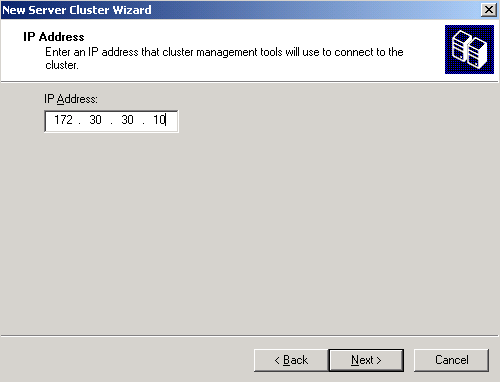
Create Exchange 2003 - 2 Node Cluster
Here are the steps for creating an Exchange 2003 cluster.
Prerequisites:
- Hyper-V
- 5 virtual machines
*4 - 2003 Enterprise Servers (DC1, NAT, Clusternode1, Clusternode2)
*1 - freenas machine (freenas)
- Create DC machine:
*Set:
- Computer name: DC1
- Domain: san.local (just set)
- Workgroup: SAN
- Primary DNS suffix: san.local
- Rename Local Area Network to LAN
- LAN Properties:
o IP Address: 172.30.30.1
o Subnet Mask: 255.255.255.0
o Default Gateway: 172.30.30.200
o DNS: 172.30.30.1

*Restart OS.
*Add ‘DNS Server’ role.


2.
Created
NAT machine:
*Add Network Adapter.
*Set:
-
Computer name: NAT
-
Domain: san.local (just set)
-
Workgroup: SAN
-
Primary DNS suffix: san.local
-
Rename Network Adapters: one WAN and one LAN
-
LAN Properties:
o
IP Address: 172.30.30.200
o
Subnet Mask: 255.255.255.0
o
Default Gateway: . . . .
o
DNS: 172.30.30.1

-
WAN Properties:
o
IP Address: 172.20.20.245
o
Subnet Mask: 255.255.255.0
o
Default Gateway: 172.20.20.1
o
DNS: 172.30.30.1


*Restart OS.
*Install ‘Remote Access / VPN server’ role.


3.
Back to DC1
machine:
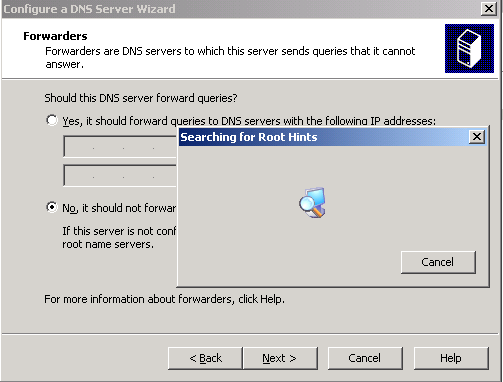
*Configure forwarders:


*Install AD on DC1:


*Create ‘test’ user in AD for cluster (copy Administrator account):

*Install Win 2003 Support Tools:

*Run dcdiag:

4.
Join NAT machine
to Domain:
*Uncheck IE Security Configuration:

*Set bindings


* Join NAT machine to Domain:

*Restart OS.
*Log on with san\test.
5.
Go to DC1 machine:
*Open DNS Server -> Forward Lookup Zones -> san.local ->
Properties.


*Open DNS Server -> Reverse Lookup Zones -> 172.30.30.x Subnet
-> Properties.


*In san.local zone delete nat host with outside of 172.30.30.x IP.
*Run netdiag:

6.
Create Cluster
Node1 machine:
*Add Network Adapter.
*Rename Network Adapters: one LAN and one ClusterHB
-
ClusterHB Properties:
o
IP Address: 172.30.0.1
o
Subnet Mask: 255.255.255.252


-
LAN Properties:
o
IP Address: 172.30.30.2
o
Subnet Mask: 255.255.255.0
o
Default Gateway: 172.30.30.200
o
DNS: 172.30.30.1


*Set Computer name: Clusternode1
*Put in san.local domain.

*Uncheck IE Security Configuration:
7.
Create Cluster
Node 2 machine:
*Add Network Adapter.
*Rename Network Adapters: one LAN and one ClusterHB
-
ClusterHB Properties:
o
IP Address: 172.30.0.2
o
Subnet Mask: 255.255.255.252

-
LAN Properties:
o
IP Address: 172.30.30.3
o
Subnet Mask: 255.255.255.0
o
Default Gateway: 172.30.30.200
o
DNS: 172.30.30.1

*Set Computer name: Clusternode2
*Put in san.local domain.

*Uncheck IE Security Configuration:
*Set bindings
8.
Set DHCP server
on DC1:


9. Prepare Openfiler or Freenas:
- Google it..

10.
On Clusternode1
download Windows 2003 iscsi.
*Install Windows 2003 ISCSI.
*Run ISCSI Initiator


*Open Computer Management

*Rename Partitions

*Install Network DTC, ASP .NET, SMTP and NNTP (for Exchange)


*Create cluster


*Manage Groups


Drag and drop Disk H:, Disk I: and Disk J: into EVS01.


Delete other groups (0, 3, 4).


Drag and drop Disk G: into FileServer and rename it to FileServer.

Rename disks in EVS01.

11.
On Clusternode2
download Windows 2003 iscsi (same as step 10.
For Clusternode1).
*Install Windows 2003 ISCSI.
*Run ISCSI Initiator
After preparing the targets go to Bound Volumes/Devices and click
Bind All.

*Install Network DTC, ASP .NET, SMTP and NNTP (for Exchange)
*Join Clusternode2 to the cluster.


*Configure FileServer service.
Rename ‘FileServer’ to ‘FileServer G:’.


*Bring the new resources online.
*Check share is accessible.

*Create a new folder ‘test’ to check that the share is accessible from both nodes.

*Move FileServer Group.


*Check
share is still accessible.
*Move all other
Groups (MSDTC, Cluster Group and EVS01).
=> Move
should be successful.
*Move all
Groups back to CLUSTERNODE1.
12.
Install Exchange
on Clusternode1.
*Run Exchange 2003 installer.


*Check all up to step 5(already done) and Run ForestPrep.


*Run DomainPrep.


*Wait until it completes and click
Finish.
1.
Install Exchange
on Clusternode2 (similar to step 12. ).
*Run Exchange 2003 installer.

*Run Setup
directly (you can skip all other checks).
*Wait
until it completes and click Finish.

14. Go to Clusternode1.
*Create new resource


*Take all
resources in EVS01 online and create another resource:


*Bring all resources online.
*Move group to Clusternode2.

*Move group back to Clusternode1.
15.
Test the failover
with an Outlook Client.
Useful link:
http://vimeo.com/4171569
Subscribe to:
Comments (Atom)